

Day-Night timelapses are also called the "holy grail" of timelapse photography. Learn how to do one yourself with this guide!
You will learn many different useful photography skills. Here, you will learn on the example below how to pull something like this off.
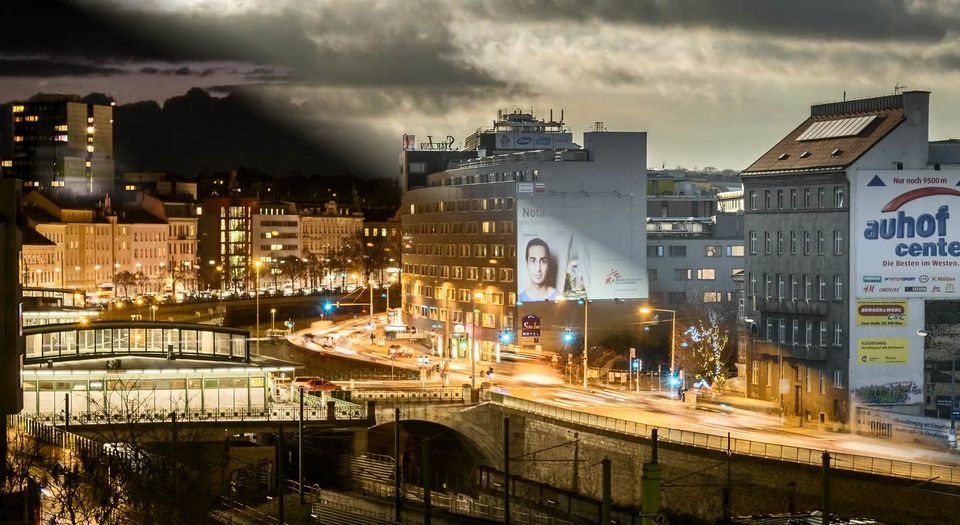
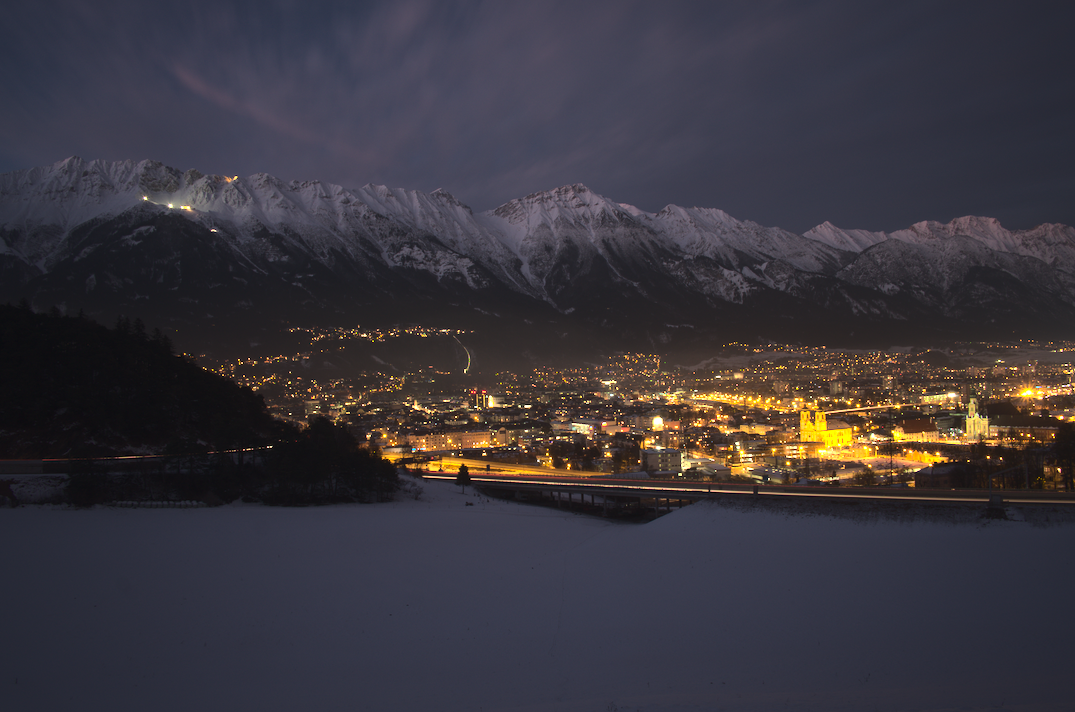
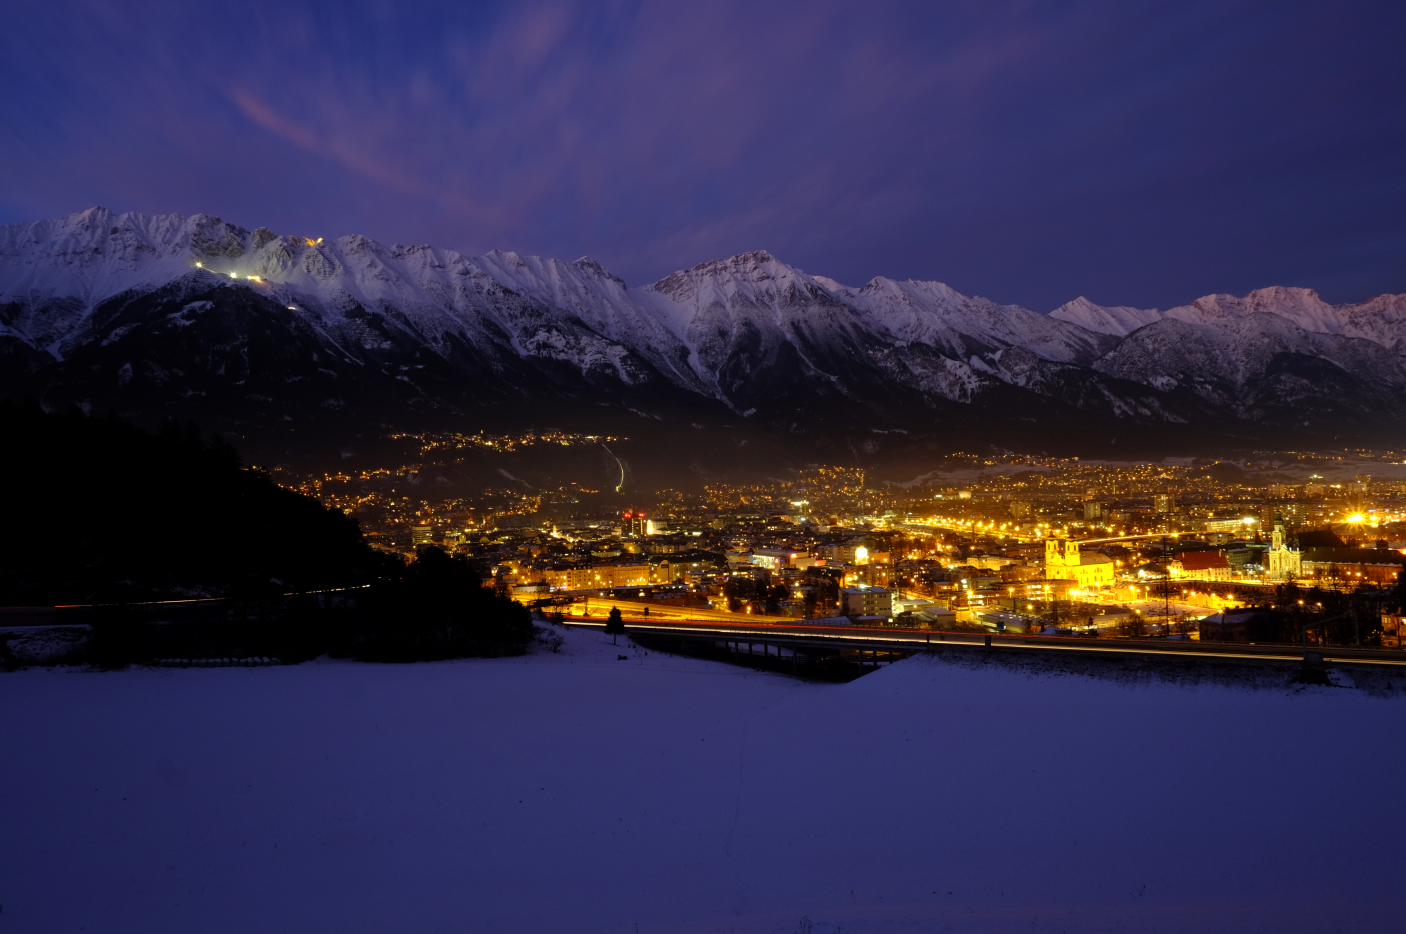
Lo and behold:
What you've seen is 23 seconds of timelapse out of the window from my flat. Looks nice, but below you'll find how much work actually has to go into this to justify the name "holy grail".
The Problem of day-night timelapses
Keep everything as steady as possible
The sun sets at a specific time and you need to be in a specific spot at a specific time, pointing your camera with specific settings to a specific direction and have everything setup without being able to change settings anymore during the process too much.
Changing interval times weirdly speeds or slows the movie. Changing the field of view creates shaky artefacts that look cheap. Changing the exposure and focus creates jumps in brightness and sharpness.
Change everything all the time
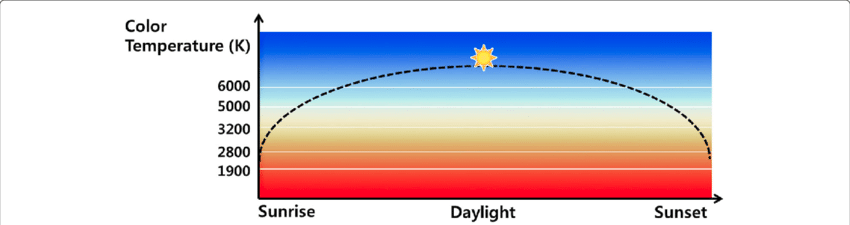
At the same time the brightness drops many orders of magnitudes and the color-temperature goes from blueish to redish. How much you might ask? A lot! Your eyes are just very good at keeping the perceived quality of light the same but to a camera sensor the differences are drastic.
Imagine taking a timelapse from noon until sunset. Setting the color-balance to 7k would end up with the bluest pictures you've ever seen just before sunset as the color temperature dropped by 5k.
Luckily, color will be corrected during post-processing using RAW-images and a photo-editor.
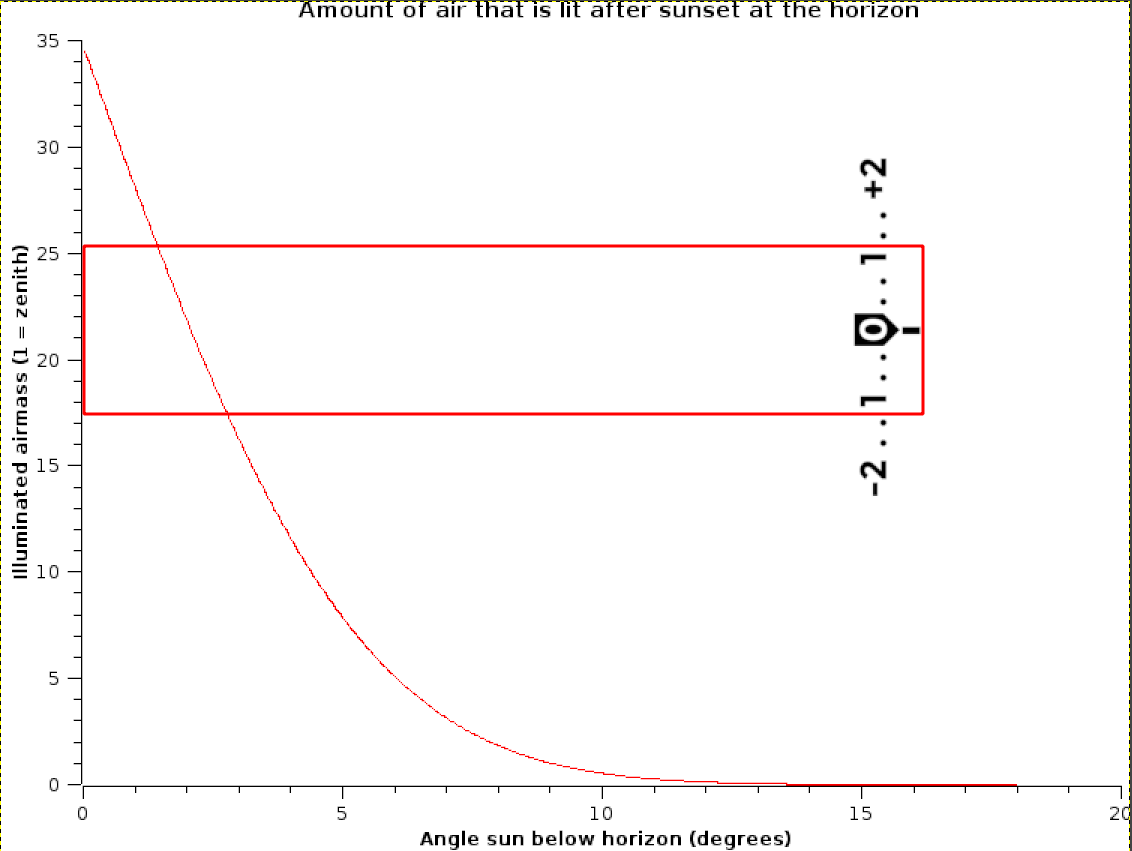
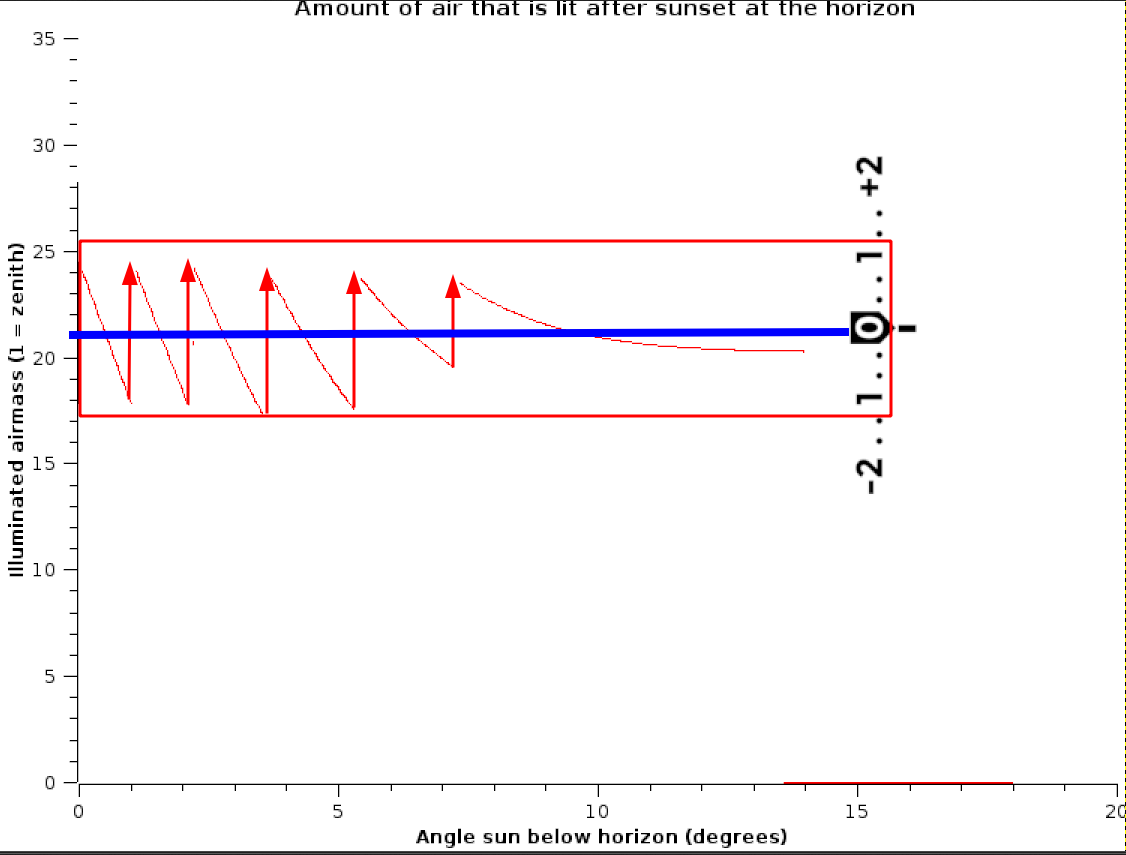
Whats more worrying is the decline in light. The graph below shows how much the illumination drops with the sun disappearing behind the horizon (angles below horizon). What this graph shows you is that you can prepare yourself for light dropping 100 to 1000-fold just after the sunset. If you shoot into the direction of the sun before the sun is hidden behind the horizon you are pointing your lens directly into the abyss of an hydrogen-reactor so expect to add a few orders of magnitude of change.

You will not be able to set your cam to manual when everything is bright and expect you still have anything nicely exposed on your pictures 3 hours later after the sun set. So how do you deal with this?
The solutions is you need to have quite a few things planned out before you start, do the right tings during acquisition and in post-processing smooth all of those factors out.
The upside: You will learn A LOT about light intensity, colors over time and truly master the manual settings.
Planning
Having the resulting video perfectly fit to the attention span of 20sec of a gold fish and/or internet user is no accident. Sadly you need to meticulously plan out what you need to do ahead of time and also have luck with the weather. Don't worry, its all doable.
How many images do I need?
I once recorded a sunset without being properly prepared and it ended up with me being cold, a full SD card and not much happening during the timelapse (see end of this video). Taking too many images is as bad as taking to few so how do you know how many to shoot in what time?
Below you find a table of Phenomena and their rule-of-thumb acquisition intervals to give you a broad idea based on what you have in front of your lens:
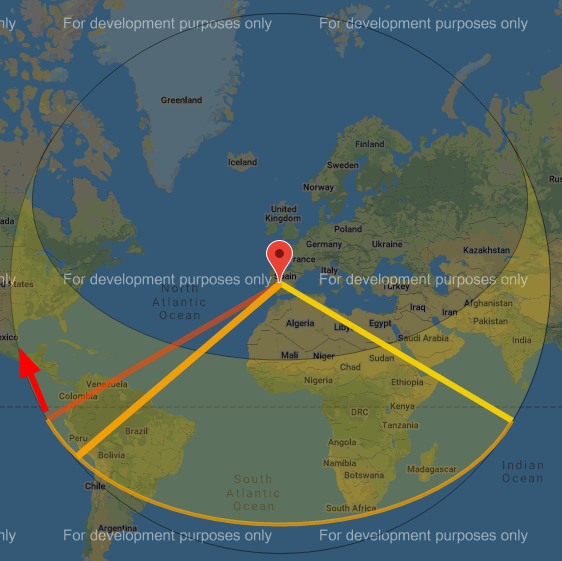
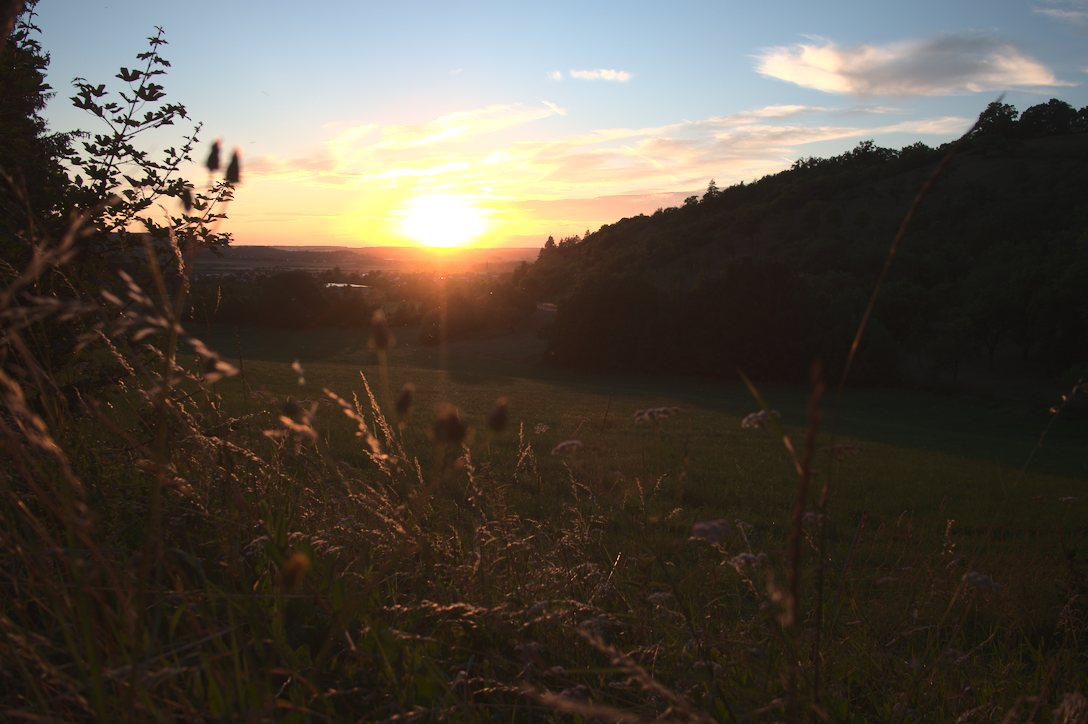
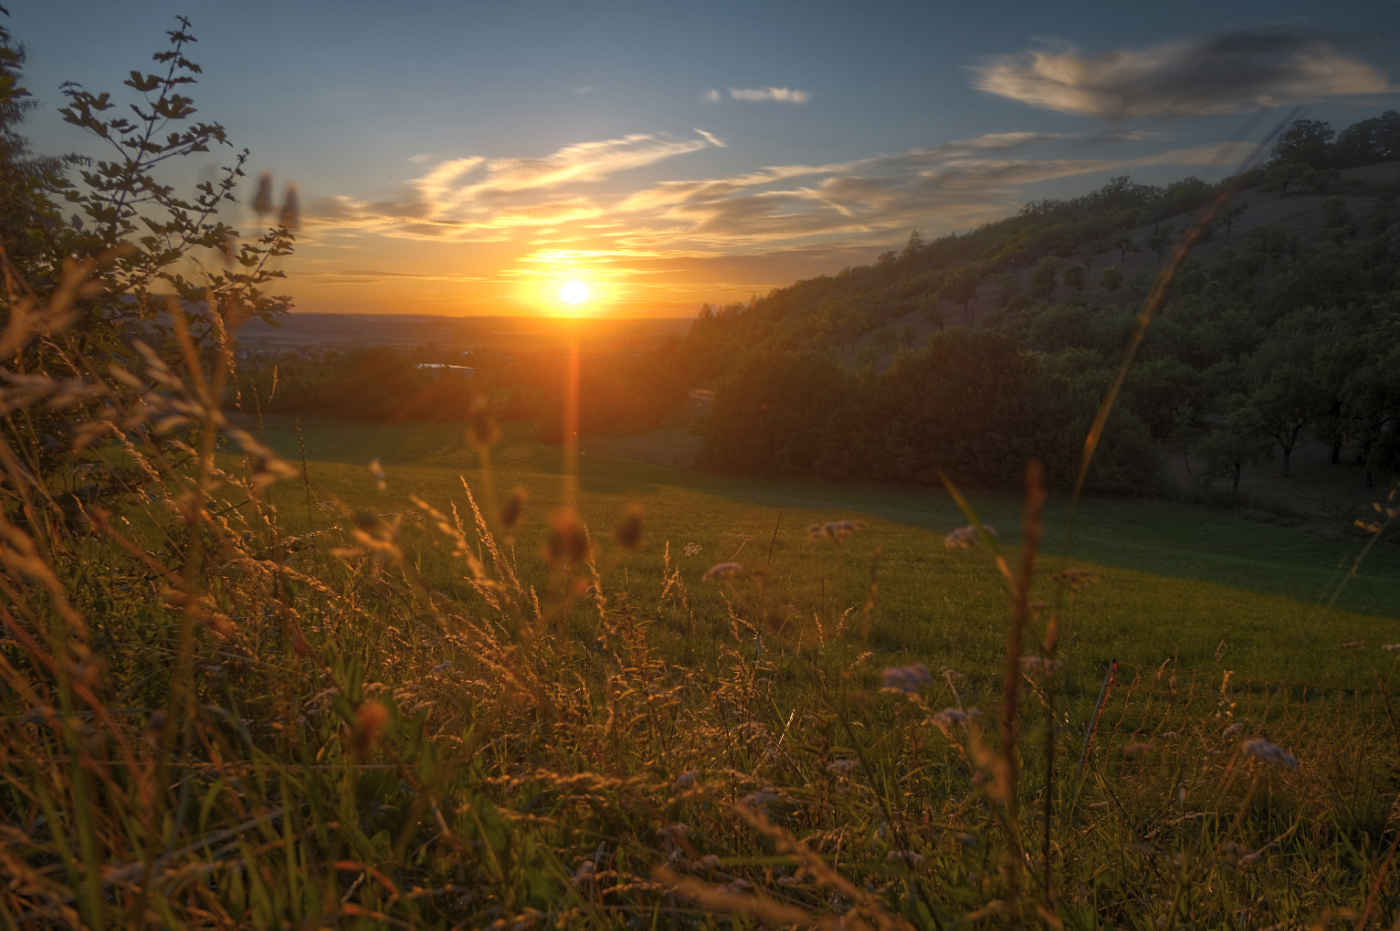
In the case of a day-night timelapse you should know what time the sun sets. Many websites like this are available to calculate when and what direction the sun sets for every position and date and position (thanks to Mathematics). In the example below you can quickly get the rough duration of sunset and
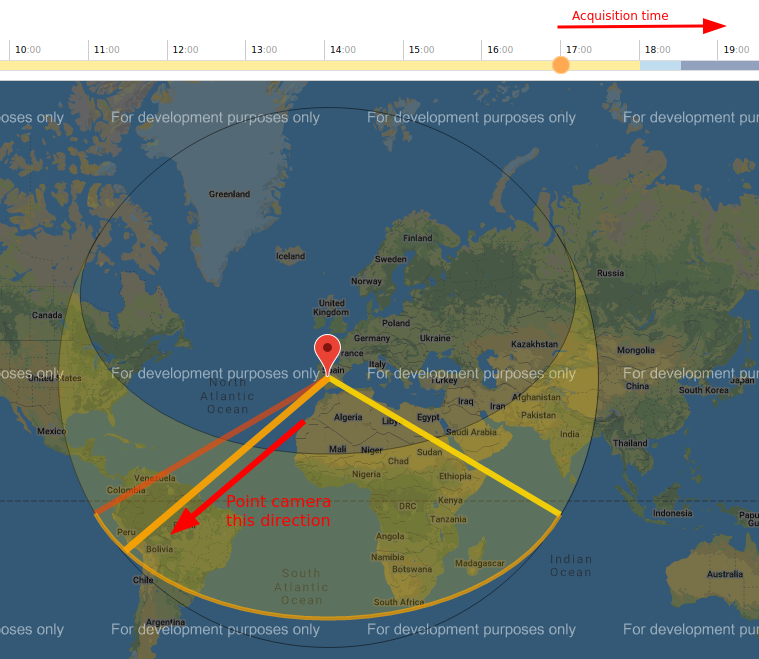
Then you can use some simple excel-magic to calculate how many images cover what part of the event and give what lenght of the output video.
So if we start at 14:00 with an interval of 20 sec we will acquire 540 images that span 180 min until 17:00. At 30 FPS we will end up with 18 seconds of timelapse. Sounds reasonable and we fixed a few variables, namely start & stop-time as well as acquisition interval.
Camera settings
The above information told us we need to set the interval to 20sec. What about everything else?
Most importantly: Go all Manual. You don't want your camera to switch erratically between settings within frames so keep it tight!
- ISO: As always, as low as possible.
- Aperture: Balance light and sharpness - If you start in the dark you will need to open it up (low aperture number) to get enough ligt in. For Landscapes during day rather use high aperture number to increase sharpness. Note that every lens has their optimum aperture (often around 5-7).
- Shutter speed: During day it needs to be short to not overexpose the film, at night it needs to be long. We will increase this variable gradually over the time of the time-lapse. Most cameras have this easily available via an extra knob so this helps with adjustments. Do not start with too long shutter speed, else you run into acquisition speed being longer than your interval once it gets dark! Result would be an odd speed up of the video the darker it gets (been there, done that: watch how the timelapse accelerates end of the first part of the vid here).
- White balance: This wil be adjusted in post-production via our RAW images. You can leave it at a reasonable setting but dont have to worry about it for now.
- RAW vs JPG: as we will rely heavily on post-production we will only need the RAWs. JPGs are not completely useless but would make the work so much harder during acquisition so go RAW.
- Focus: All manual! Set it once, take a test-pic, control the sharpness is ok and never touch it again.
Acquisition
The time has come to push the button - Chemical Brothers
Tripod is fixed, all settings set and the time is right. Weather looks ok and your hopes are high. So lets start!
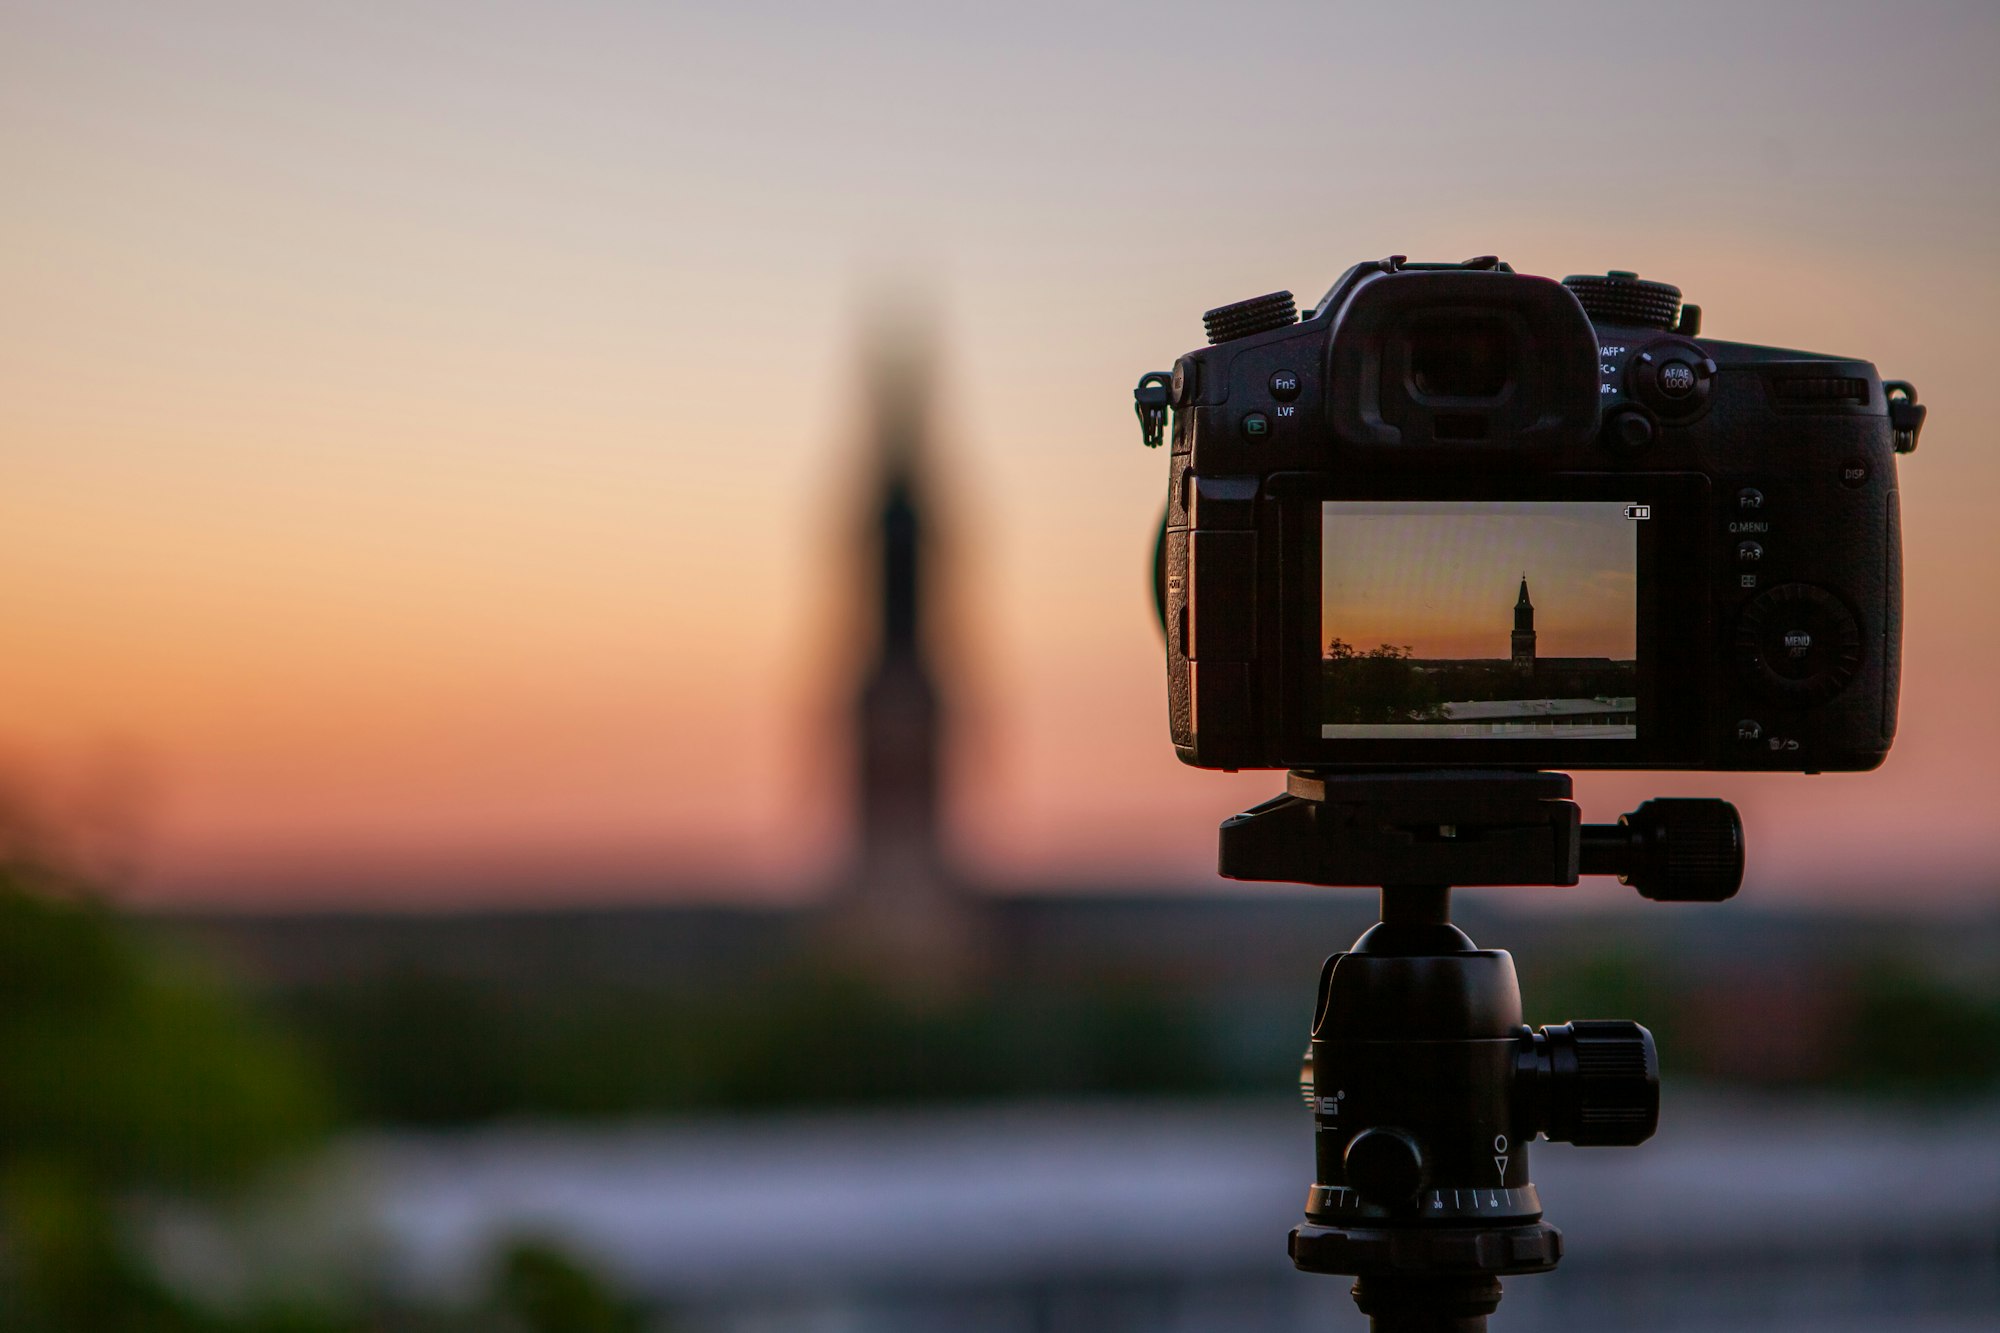
Fire off the first image with the intervall timer set and lean back. Well almost: We will need to readjust the settings time after time during the timelapse. Remember the gigantic drop in ambient light!
Is your SD-card speed quick enough to save the image in case the exposure time goes up to 15 sec with a 20sec interval?
Did you properly fix your Tripod?
Do the test images look nice?
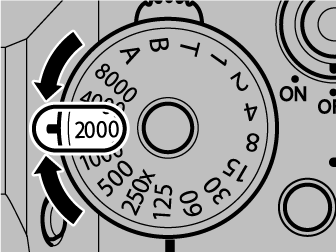
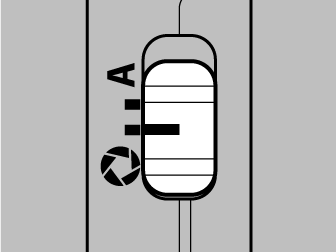
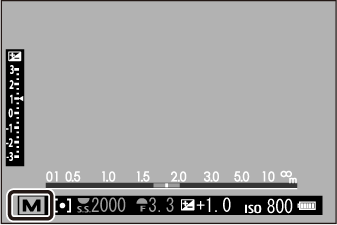
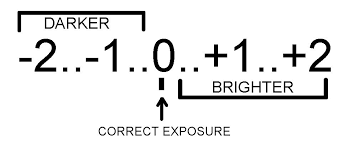
Your job is to do manual exposure correction and keep the exposure roughly around 0. You've probably seen these indicators on your camera that go from -2 to +2 or similar:
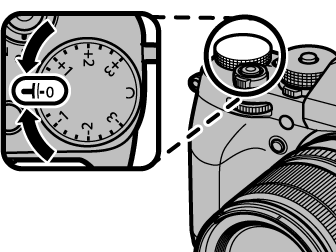
My cam even has a manual wheel to adjust this directly. What it does is to change the available remaining variables to increase or decrease the overall brightness of the image.
If you change this wheel to +1 and your exposure time is fixed, the cam will either increase ISO or open the aperture (lower aperture number) or both. If you are in full manual the wheel has no variables that can be influenced and does nothing. Adjusting this via the time
When looking on the screen, you will find that over time the exposure drops as the sun sets.
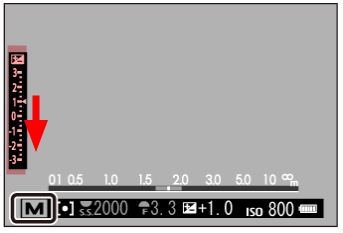
You will need to keep the exposure in the sweet-spot around 0ish.
Apply the following algorithm:
- Check the screen for exposure setting
- If -1.5 < exposure < -1
- Decrease shutter speed (make brighter) until 0 < exposure < +1
- If shutter speed > interval: you fucked up. Increase ISO or open Aperture instead keeping shutter speed smaller than interval
- go to 1 until end of acquisition time

Post-processing
SD-card full and everything went well? Let's finish up! What you need:
- RAW-editor (e.g. Lightroom)
- Optional: Best a time-lapse editing software like LRTimelapse
- A jpg to video converter like FFMPEG
- Patience
Data transfer & Importing to Lightroom
Why is this a separate point? Because it takes forever if you don't have a good setup. So rather do that over-night or grab a cup of coffee
Making nice pictures out of RAWs
As you recorded RAWs you have all you need to adjust the images to look nice.
Pick a few frames from the beginning middle and end of the timelapse and make them look nice. Make sure to copy paste the settings between images and make them look as similar as possible. This is a precondition to the next step.
Adjusting Exposure and Temperature
If you just take the RAW images and create a timelapse you will notice huge jumps in brightness whenever you adjusted the exposure time (as expected). This post-processing step will need to equal out those jumps in both exposure as well as the steady decline in temperature (increased redness over time).
Here's where a 3rd party time-lapse editing software like LRTimelapse comes in handy and they have a great tutorial on exactly that topic (see below).
In short, the algorithm in pseudo-code is:
b_set = 0 # desired exposure over timelapse for all frames
t_set = 3000 # desired temperature over timelapse for all frames

for image in timelapse:
	b = image.get_avg_brightness()
    t = image.get_avg_temperature()
    image.write_meta(exposure = b_set - b) # write change of exposure to frame to get to 0 brightness
    image.write_meta(temperature = t_set - t) # write change of temperature to frame to get to 0 brightness
    image.apply(other_settings()) # all the beautification you would like to apply to the image, contrast etc.
    image.render()
FFMPG.make_avi(timelapse)
Rendering and conversion
Rendering the images - writing the jpgs - takes another eternity if your hardware is bad as well as creating the video. For FFMPEG I used: 29.97fps, 4k resolution H265 compression.
The output
Shot with Fuji XE2 56mm 1.2 at 13s interval over the course of 2.5h.
It was much more work than anticipated but I learned a ton on brightness and light-temperature over time. Also makes you appreciate other peoples timelapses much more.
Where to go from here
Obviously moving timelapses: either by a fancy moving hardware rig or simply mounting your camera on an egg timer that rotates 360deg per hour.
